
How to remove a leak through the relief valve (Seawave Gumotex kayak)
- Paws To Peaks

- Apr 12, 2025
- 3 min read
Updated: May 31, 2025

Frequent getting in and out on sandy beaches and in small bays on lakes causes some water to get into the kayak, and with it sand and other small impurities.
In 99% of cases, they can be rinsed out, and when the kayak is dry, they can be removed thoroughly from the inside with a vacuum cleaner.

There is one place where very small particles of sand can get in with intensive use of the kayak, even when we clean it carefully at the end of the day.
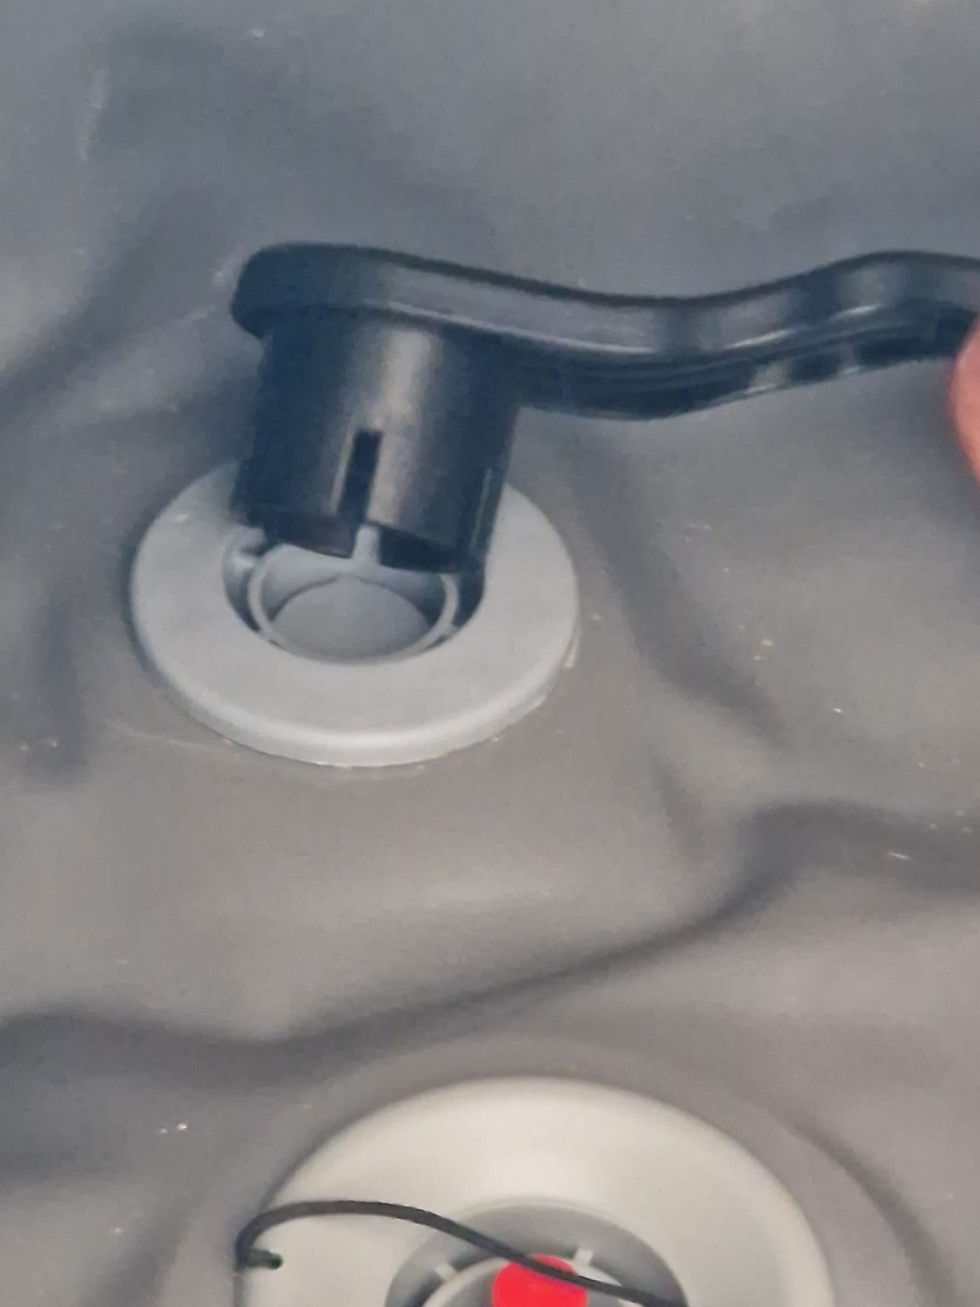
This place is the overflow valve in the floor chamber of the kayak. It is located in the stern part behind the last seat. In front of it, there is a valve for filling the kayak floor with air.
The relief valve protects the bottom of the kayak from excessive pressure and, once it is exceeded, releases excess air and the valve closes automatically unless...
very fine sand gets on the rubber part of the valve.

In such a situation, the valve will not close and the air from the chamber at the bottom of the kayak will constantly escape – we had such a situation while watching the beautiful coast with caves near the Algarve in Portugal from the sea.
Even though our kayak has three independent air chambers, the impression of a soft bottom at first glance makes you think ‘we have a hole!’
... and yet there are three of us in the inflatable kayak, sailing across the Atlantic Ocean

Fortunately, we managed to limit the leak by unscrewing and rinsing the valve on a small nudist beach spotted from the sea, but this does not solve the problem of the recurring leakage.

This is the solution we have used – so far it has been effective in limiting the access of sand to the valve, and at the same time it does not interfere with the proper functioning of the valve.

This modification is not difficult.
Use a spanner to unscrew the pressure relief valve
Rinse or wash the valve with detergent
Before installing the valve, make sure that the part of the valve that remains in the bottom chamber is correctly positioned.

NOTE! it is a wrongly adjusted part of the valve - the protruding screw should be turned towards the bottom of the kayak so that it can be felt through the kayak's coating.
This is the correctly positioned part of the valve that remains inside the bottom chamber

This is the correctly positioned part of the valve that remains inside the bottom chamber. Screw in the washed-out pressure relief valve

From the bottom, you will clearly feel the shape of the screw, which you hold down, and at the same time from the inside of the kayak, tighten the valve with a wrench.

you will clearly feel the shape of the screw, which you hold down, and at the same time from the inside of the kayak, tighten the valve with a wrench Tighten the valve firmly with a wrench, holding the screw-shaped bottom part of the wrench through the material of the kayak floor.

Make sure that you have cleaned the material to which the valve is pressed before tightening it with a wrench. Cut a square out of the microfibre glasses cleaning cloth and place it under the valve protection cap.


Place the cut microfibre centrally over the valve opening and stretch the valve cover over it.

Press the valve cover, making sure that it is centred while pressing.

NOTE!
The valve cap can be easily removed by gently inserting a narrow, flat screwdriver into one of the holes in the cap.
Connect the pump and inflate the bottom of the kayak to a pressure of 0.3 atm.
The valve should gently release the air, and after a while the flow should stop.

To do this, you will need:
- a small flathead screwdriver
- a pair of sharp scissors
- a microfibre cloth for cleaning the glasses
- the original valve wrench
- a tap with hot water and detergent
- a pump for filling the kayak
Our tip for all kayak trips It is always a good idea to have a valve key with you, and ideally a spare valve – then the repair takes a few minutes. Of course, you will need a pump to fill the chamber in the bottom of the kayak.


Comments